Keeping it Simple: Making the Perfect Pie Crust.
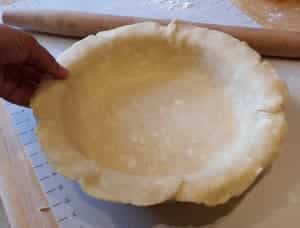
Pie Dough… it was something I hesitated for years to make. Several years ago I decided to give it ago. I really don’t like wasting ingredients in experimentation but pie crust really is forgiving. Seriously, once you fill that baby with sugary fruit or custard it has to be a huge fail (like using way too much salt or burning it) for people to not eat it.
After several years of pie making I wanted to share with you the tricks and tips I have learned. Below, I share my favorite pie making recipe, Simple tips to make each pie crust a success and even a video on how to roll it out when finished.
Tips and Tricks for Making the Perfect Pie Crust
-
Don’t be afraid to learn from your mistakes.
- If it doesn’t work out, try again… My ugliest looking pie crusts have still tasted good. Maybe there were cracks in it… maybe I didn’t get the thickness even… but fill that crust with yummy fruit or pudding and everyone loves it anyways. Don’t want to make a pie? Just cut it into strips and bake it with cinnamon and sugar on it.
- Sometimes you just have to smile and let it not be perfect. Learning is a great thing. Embrace it!
- When mixing and rolling out… Keep it cold
- The pockets of shortening and butter that are in pie dough make those beautiful flaky pockets that we all love. You have to keep the ingredients cold so that those wonderful tiny pieces will form those pockets later on during bake time.
- Your dough will most likely stay cold enough during rolling. However if you find the butter/shortening pockets start melting just pop it in the freezer for a couple minutes (1-2) and then continue.
- Use a great rolling pin! A good rolling pin should spread this delicate dough easily and smoothly. We don’t want the dough to stick or tear … so,we want a rolling pin that will hold a light dusting of flour and not weigh too much so we can control the rate of spreading.
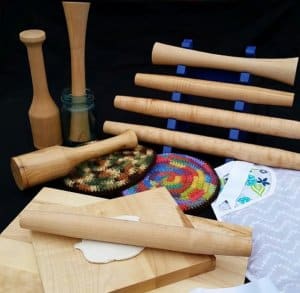
- A Hardwood French Style Rolling Pin is by far my favorite and pastry chefs will agree. (Which is why we now sell them). A solid maple, french style rolling pin is the perfect weight, will hold a dusting of flour, you can feel the thickness of the dough through the pin and has an ergonomic design that is gentle on your hands and wrists. Our 20″ pin is perfect for pie making because the non-tampered section is the perfect width for pie crust making.
- Why not an American Style rolling pin? An american style pin has handles and ball-bearings that the center rod rolls on. Most are wood some are marble. There are three major reasons I do not like this style. 1) If it is marble it is way to heavy for this delicate dough 2) When you roll it over the dough you don’t feel the dough but the ball-bearings, making it harder to judge even thickness and 3)They hurt my hands. I can not grip the handles for a long period of time without my fingers hurting.
- Why not metal or silicone? A metal rolling pin is too heavy and can generate cracks and sticks to the dough. Pins made of silicone and metal are also so smooth that a flouring of dough does not stick to the surface. If they get a ding or scratch in the surface they also can not be refinished. A wood rolling pin can be lightly sanded and re-oiled easily for continued use.
- Note: If you have a rolling pin passed down through the generations I encourage you to keep it and even display it. However, if you want to make great pies and that old rolling pin isn’t ideal for the job, get yourself something you love. I am sure your grandchildren will then treasure that pin too and remember the lovely pies you made.
- Find the right amount of moisture.
- My most common mistake while making pies is not enough moisture. Don’t be afraid of adding water. Of course you don’t want too much water but not enough makes it impossible to roll it out later. It will just crumble. So, your dough at the time it rests in the fridge should be moist enough that it doesn’t show dry cracks when put into a disk shape.
- Use both butter and shortening.
- An all butter crust tastes very distinctly of… well butter. Yes, we love butter but it shouldn’t scream the butter flavor. Shortening in the mix gives you that well rounded “pie crust” flavor. All butter crusts are also a bit lighter but have a more ill-defined edge after baking. The combination butter and shortening is a wonderful combination that gives pie crusts a great flavor and the aesthetic beauty you want in a pie.
The Best Pie Crust Recipe:
Pie Dough Crust
Perfect Pie Crust Recipe. This lovely crust is easy to make and gives a flaky scrumptious crust for any type of pie.
- 2 1/2 Cups All-Purpose Flour (extra for rolling out dough)
- 2 Tbsp Sugar
- 1 tsp table salt
- 8 Tbsp vegetable shortening (cut into 1/2 inch pieces and chilled)
- 12 Tbsp unsalted butter (cut into 1/4 inch pieces and chilled)
- 6-8 Tbsp ice water
- Place the flour, sugar, and salt into a food processor and process until combined. Put the shortening in the processor and pulse until mixture has the texture of course sand. (About 8-10 pulses).
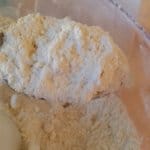
- Place butter pieces on mixture and pulse until mixture resembles coarse crumbs (about 10 more pulses). Transfer to a bowl.
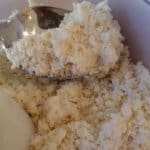
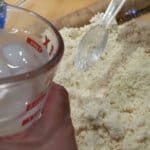
- Sprinkle 6 tablespoons of ice water on top of the mixture. Stir and press the dough until the dough sticks together. ( I like to use a stiff rubber spatula) If the dough does not come together than add water 1 tbsp at a time. Dough should come together easily without large areas that are crumbly.
-
Dough should come together in a smooth ball. Dough should come together in a smooth ball. If it is crumbly add more water one tablespoon at a time. If it becomes sticky add a little flour.
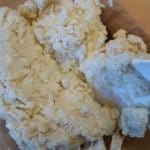
- Note: If at any point your butter pieces start to melt put the whole thing in the fridge for a few minutes. Butter chunks= flaky dough. Melted butter = a flat hard crust
- Place dough on a lightly floured surface and incorporate into one large dough ball. Divide the dough into two even pieces.

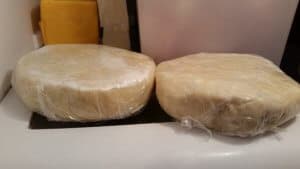
- Flatten each ball into a 4 in disk and wrap each tightly in plastic wrap. Refrigerate for at least 1 hour and up to two days. At this stage you can also freeze the tightly wrapped dough for 2 months. When you are ready to use your dough and before rolling it out, let it soften until workable.

Adapted from America’s Test Kitchen.
For Tips on “How to Roll out a Pie Crust with Ease” see our YouTube Video HERE
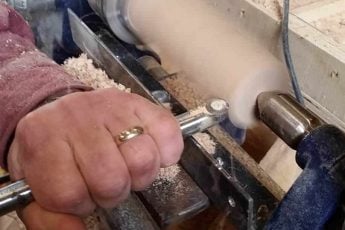
French Style Rolling Pins are preferred by pastry chefs for rolling our pie dough. You can find our French Style Rolling Pins at our Store. Each Pin is beautifully handcrafted and Made in the US.
So, now you have this beautiful pie dough disk in the fridge ….Now What?
Whether you are making a yummy chicken pot pie, a fruit pie or a custard pie the steps are about the same. Below is our YouTube tutorial video “How to Roll out a Pie Crust” or you can read the directions below.
- First, all new pie makers take a deep breath. No really… right now take a breath…. You have done half the work all ready. Remember: Even if you have to patch half of the silly thing no one is gonna notice because it will be covered by filling. (Believe me. Been there, done that. Don’t tell people about it’s faults, Say thank you graciously when they say it tastes great and it will)
- Let’s get started. Lay your disk of dough on a lightly floured surface (or between two pieces of parchment paper or plastic wrap. Love this trick. Makes it super easy to transfer later to a pie pan.)
 After it has had a few minutes to become workable out of the fridge, roll the dough outward from the center using moderate pressure.
- As I roll I have three goals: make it a certain size , give it an even thickness, and Keep it in one piece. If You are the slow, methodical type and you find the chunks of butter in your dough seem to be melty put your rolled dough in the freezer for a minute or two and then continue.
- NOTE: I use a French Style Rolling Pin. After falling in love with this style of pin we decided to offer them at our store. I love them because:
- They make it easy to make an even thickness because you can feel the subtle thickness differences under the pin.
- Wood pins hold a consistent neutral temp. They do not heat up and melt those buttery pockets.
- They are an ergonomic design that is easier on your hands and wrists.
- Hardwood Maple– French Style Rolling Pins are a good weight for working with delicate pie crusts.
- Roll dough turning it a quarter turn every few strokes. Add more flour as needed to the surface of the dough , on your pin and under your dough. The dough should be able to slide on the counter. If it gets stuck, use a flat scraper to loosen it from the counter and add some flour to that spot. You just need enough flour for a very thin coating that helps prevent sticking.
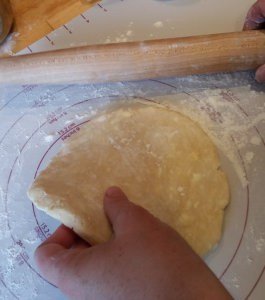
- Note: When working with parchment or plastic wrap: keep a light powdering of flour on the surface of your dough so it doesn’t stick and flip it over half way through to make sure the top and bottom will both come off easy)
- If cracks form: I always keep a small bowl of water around when rolling dough. When a crack forms I dip my finger in the water, put my now wet finger in the crack that is forming and squish the sections back together. That thin layer of water acts like a glue. I reflour that spot and keep going. If a large crack forms I “steal” a piece of dough from another spot and “patch” that piece in using the water. Now it is back to rolling.

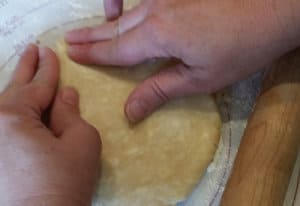
- Roll your dough to the desired even thickness and to the size you want. If you are making a pie that is a 12″ circle.
- Roll dough around rolling pin. Then gently unroll the dough over the pie plate.
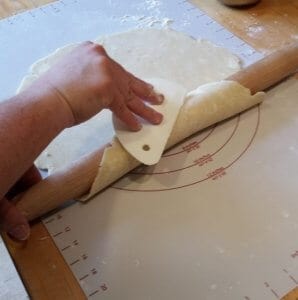
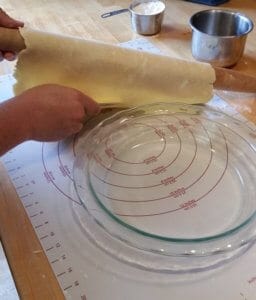 Adjust it so it is in the middle, gently pushing into sides. If it cracks, don’t panic. Just use the previous water trick to patch it back together.
 - Now you are ready to bake your crust or fill it according to the directions on you pie recipe. Enjoy!

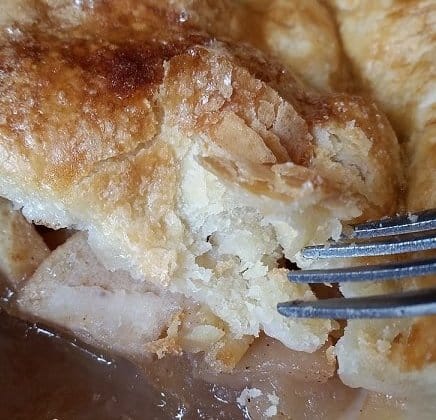
Here is the beautiful flake I got on this Pie Crust. YUM!
Well I hope this tutorial gives you lots of useful tips for making pie crust. If you are a new pie maker and it doesn’t work out your first few tries…DON’T GIVE UP! It sometimes takes a while to build up a skill, BUT it is very worth it. Keep at it and enjoy!
Happy Baking!
The Frabjus Lady
Visit our store at ladyandthecarpenter





Peter Long
August 22, 2017 6:10 amThank you for your detailed instructions. I will try very soon. I want to know how to make the filling next and I look forward to your update.
Jean | DelightfulRepast.com
June 29, 2017 2:12 pmGreat tutorial! I love making pies, been doing it since I was a teenager. I’ve used every kind of rolling pin, even a wine bottle with the label removed, because I’ve made pies in other people’s kitchens. And I agree with you on the best rolling pin. Though my grandmothers made perfect pies with their ball-bearing rolling pins, I can’t stand them. A maple French pin that will hold a dusting of flour is perfect!