We reached our 2014 green bean goal. YA!!! The Trellised Green Beans did great!
Our goal this year was to harvest, blanch and freeze 12 gallons of green beans for the year. So far we have 12 bags in the freezer and probably a few more coming. This of course doesn’t count the fresh ones we ate during the harvest time.
Last year I was able to harvest 5 gallons of beans and they didn’t last very long. They are SO much better than store bought. The kids even noticed when I switched.
I recently had someone ask me on our Facebook page how many bean plants produced my 12 bags of beans and how much space I used. I figured since I have an empty trellis to show you, I have at least one curious reader and it’s never too early to start planning for next years garden, I would share how we grow our beans. I LOVE the method I use for growing them.
Trellises for Pole Beans
(or other climbing plants)
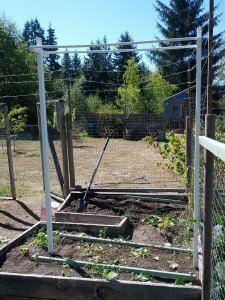
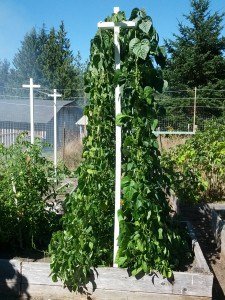
Here is an empty trellis. It is empty because the vines were no longer producing.
It measures 6 1/2 feet high (from ground level) x 5 feet wide. The arms at the top come out of each side 7 inches with the poles at 6 inches. The end poles are a t-shape and are pounded into the ground about 18 inches so that needs to be figured into the measurements. The two cross poles are PVC pipe and where they meet the wood they are screwed into the wood.
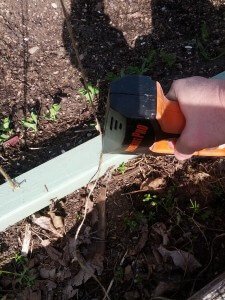
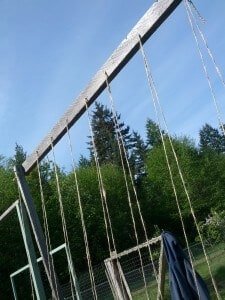
On the ground I have placed a piece of wood and staked it into the ground, 18 inches from the center on both sides, to keep it from sliding around. When I set these up for the spring I will add twine from the board up to the PVC pipe, using a nail gun to secure it to the wood and just looping it around or staple it at the top.
Planting your Pole Green Beans:
Wait to plant your pole bean seeds until all chances of frost have passed. Read the packet instructions for the pole beans you purchase for more info. Also, your local nursery can give you more climate related advise on when to plant.
How many plants fit on one side of the trellis?
Disclaimer: Just so you know, I am not very good about spacing plants properly. I don’t like to thin them out. I just let them grow. So, any expert gardener would tell you to space them different. Now that you know that…
My trellises are 5 feet in length. They have two sides. My seeds get planted about 3″-4″ apart. Not all of them come up and since I have trellis lines I simply guide/train the plants in the more crowded areas to spread more to the less populated spots. If I have a big space I just shove more seeds in. Yeah I know, very scientific. That means I have about 15 plants per side. That works out to about 110 plants for this year.
How many plants gave me an over 13 bags yield of prepped beans?
First of all… This year they didn’t do fabulous. I didn’t amend the soil like I should have before planting. Last year with only 3 sections/sides I got 5 gallons of prepped and frozen beans. Last year, we would go out to the garden and fill bowls and bowls worth. This year not so much. This year I had 7 rows (3 that are about 6 1/2 feet in length and 4 that are 5 feet in length). I got (not counting what we ate fresh)13 gallons of prepped green beans. If they had produced this year like last year I am positive we would have been closer to 16-18 gallons.
When planting your seeds plant them just inside the trellis lines and when the pole beans spring up most of the plants will find the line on their own. If they don’t, simple take the little stringer and wrap it around your twine line several times.
If you want to learn more on how I prep green beans for freezing see my post: Preserving the Harvest: Green Beans
Why not use grid trellis netting? or have them climb an all wood trellis?
We used this great nylon trellis netting our first year thinking that we would be able to reuse it each year. Well…. The vines were wrapped crazy around it. Yes, I could have reused it if I wanted to stand there and detangle it all for HOURS.
I don’t want to spend LOTS of time untangling little vines off of wood or nylon line. Since I have better things to do with my life, we switched to twine.

Close-up Green beans
Twine is MUCH better
1) The plants seem to grab onto it easier
2) LOTS cheaper
3) It can be burned or composted. For easier composting I would cut into smaller sections and then just throw the whole mess of twisted vines and twine in the compost bin.
4) It’s easy to put on the trellis.
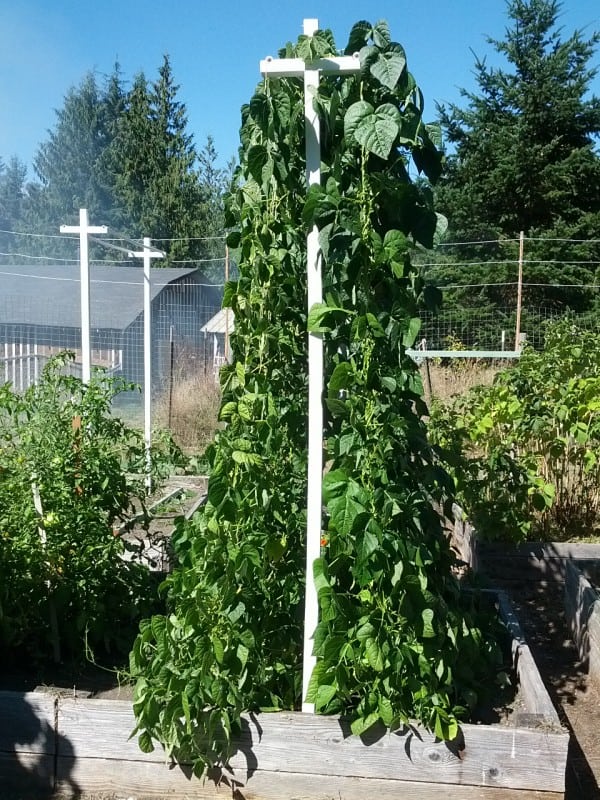
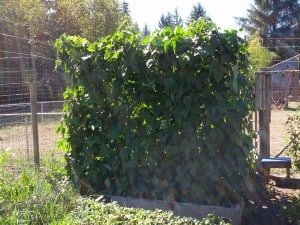
Here are the trellises covered with vines. I love vertical gardening!
It’s a beautiful thing! These are still hanging because they are still producing. Once they are finished I simply cut all the lines at ground level, pulled out the plants, cut the top lines and clear off any crazy stragglers off the fence. It took us about 5 minutes to clear off a full trellis earlier today.
Would love to hear from you! If you have a comment question or you have a great vertical gardening idea you would like to share put a comment with a link in the comments.
Happy Gardening,
The Frabjus Lady
Thank you for visiting our Blog.
Click Here to visit our store:

dead trigger 2 cheats
October 20, 2014 7:15 amExcellent goods from you, man. I’ve understand your stuff previous to and you
are just extremely magnificent. I really like what you have acquired here,
really like what you’re stating and the way in which you
say it. You make it entertaining and you still care for to keep it wise.
I cant wait to read much more from you. This is really
a tremendous website.
frabjus
October 27, 2014 7:40 pmThank you! I love doing it.
Pam Baker
September 11, 2014 2:22 amLeave the roots in the ground. That is where they fix nitrogen and it will naturally improve your soil. Cut the plants off at ground level and compost the tops or feed to chickens/pigs.
frabjus
September 14, 2014 8:50 pmAwesome tip. Thanks!